

Most popup tools are built for one platform. Flyerimage is a free WordPress popup plugin, but it can also show your popups on other websites. You design a campaign once in WordPress, then run it on Shopify, Webflow, Wix, Squarespace, Framer, Carrd or a plain HTML site by adding a single line of code to that site.

What you need
- A WordPress site (WordPress 5.0 or newer, PHP 8.0 or newer) with Flyerimage installed and activated. The plugin is free.
- Your WordPress site must be online and reachable, because the popup script and campaign data load from it, not from a third party.
- Access to the other site’s custom code area, where you can add code to the
<head>. On some platforms custom code is a paid-plan feature.
How it works in one minute
When you add a website in Flyerimage, the plugin gives you a one-line embed tag for it. You paste that tag into the head of the other site. Visitors to that site then load the Flyerimage script and your campaign data from your WordPress site, and your campaign decides when to show. Views, clicks and closes are recorded on your WordPress site.
Step by step
- Install Flyerimage. In WordPress, go to Plugins → Add New, search for Flyerimage, then install and activate it.
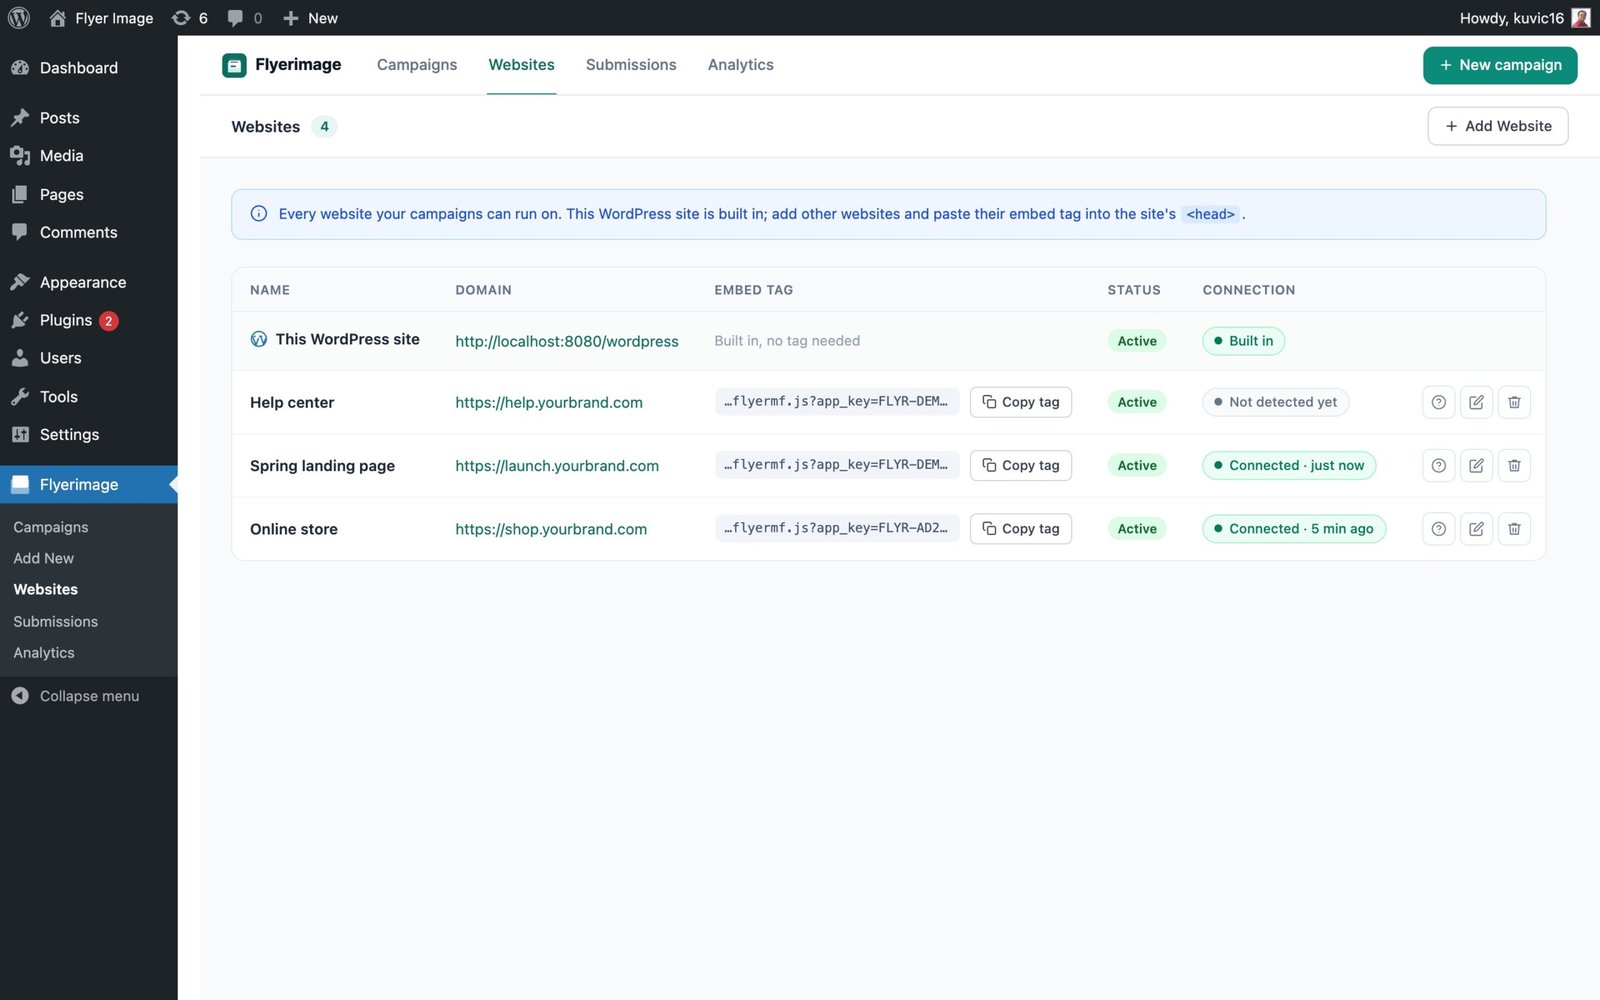
- Add your other website. Open Flyerimage → Websites and add the site you want to use. Copy its embed tag.
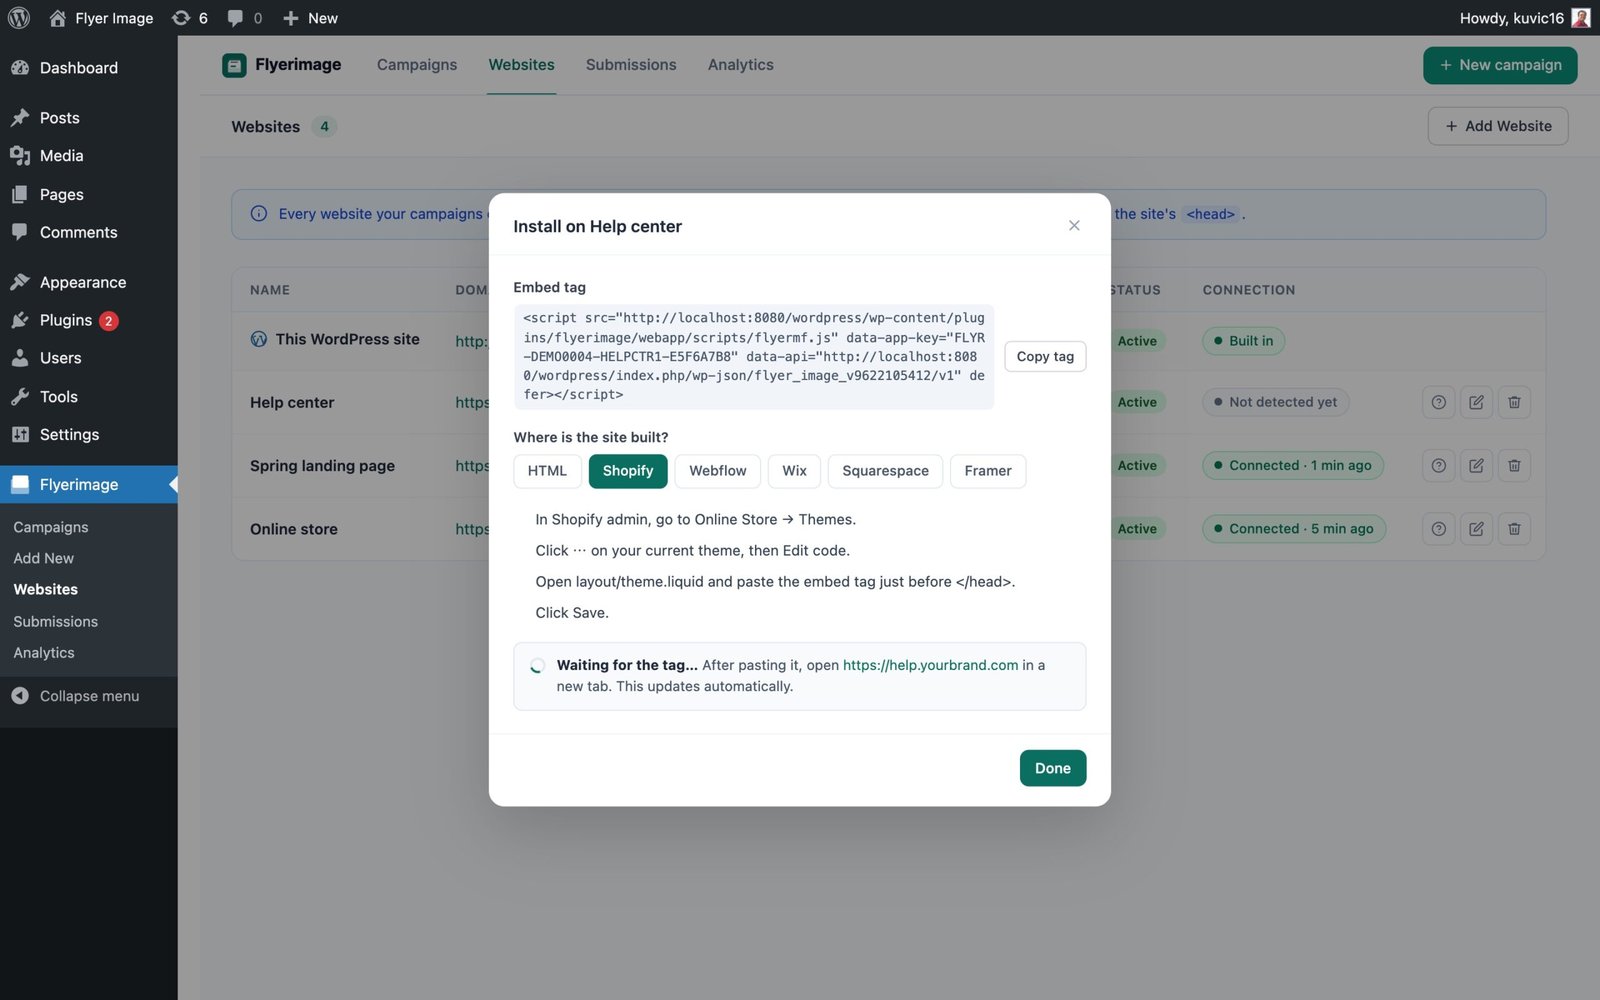
- Paste the tag into the other site’s head. The Flyerimage Install guide has step-by-step instructions for Shopify, Webflow, Wix, Squarespace, Framer and plain HTML.
- Wait for “Connected”. The Websites screen shows each site’s status, and it changes to Connected once the tag is detected.
- Create your campaign. Choose a template or a blank canvas, design the popup, then open the Rules tab and choose where it runs: WordPress, your external sites, or both.
- Set the rules and activate. Pick a trigger (time on page, scroll depth, exit intent, a click or inactivity), the pages, audience, devices and how often it appears. Save and make sure the campaign is Active.
- Test it. Open the other site in a private window and check that the popup appears and that form submissions arrive.
Where the embed tag goes on each platform
Menu names change from time to time, so follow the Install guide inside the plugin for the exact steps. As a rough guide:
- Shopify: add it to your theme code, just before the closing
</head>tag in the main theme file. - Webflow: add it in the site’s Custom code settings, in the Head code section.
- Wix: add it under Settings → Custom code, set to load in the Head.
- Squarespace, Framer, Carrd and plain HTML: use the platform’s code injection or custom code area for the head, or paste it into the page’s
<head>directly.
Tips for running popups on other sites
- Start with one campaign. Check it on desktop and on mobile before adding more.
- Show it once per visitor. A popup that appears on every visit gets closed on every visit.
- Pause without touching the site. You can pause a website in Flyerimage without editing that site’s code again.
- Keep your WordPress site healthy. If it is down, popups on your other sites cannot load.
A note on visitor data
On WordPress and on external sites, Flyerimage records popup views, clicks and closes together with the visitor’s IP address, device, browser and page address, and form submissions are stored in your WordPress site. If you run it on other websites, mention this in those sites’ privacy policies, and think about whether your visitors’ location means you need consent. This is general information, not legal advice.
Common questions
Is it free? The plugin’s WordPress.org listing describes Flyerimage as free, with no account needed.
Do I need to know how to code? No. You paste one line of code once, and everything else is done in the plugin.
Which platforms are supported? The listing names Shopify, Webflow, Wix, Squarespace, Framer, Carrd and static HTML sites.
Try it
Install Flyerimage from WordPress.org or read more on the Flyerimage product page. New to popup rules? Start with How to add an exit-intent popup in WordPress for free.